How to Build Your Own Handheld Air Compressor for Cyclocross
You’ve probably seen one in the parking lot of your local ‘cross race—a battery-powered, handheld cordless air compressor with a Silca presta valve head. Is it necessary? No. Is it cheap? Definitely not. Is it pro-as-hell—and one step closer to achieving “Belgian-level” cyclocross gear-status? Absolutely. So here you go — get ready to spend some money and save some valuable trunk space with the ultimate guide on how to set up a cordless air compressor.
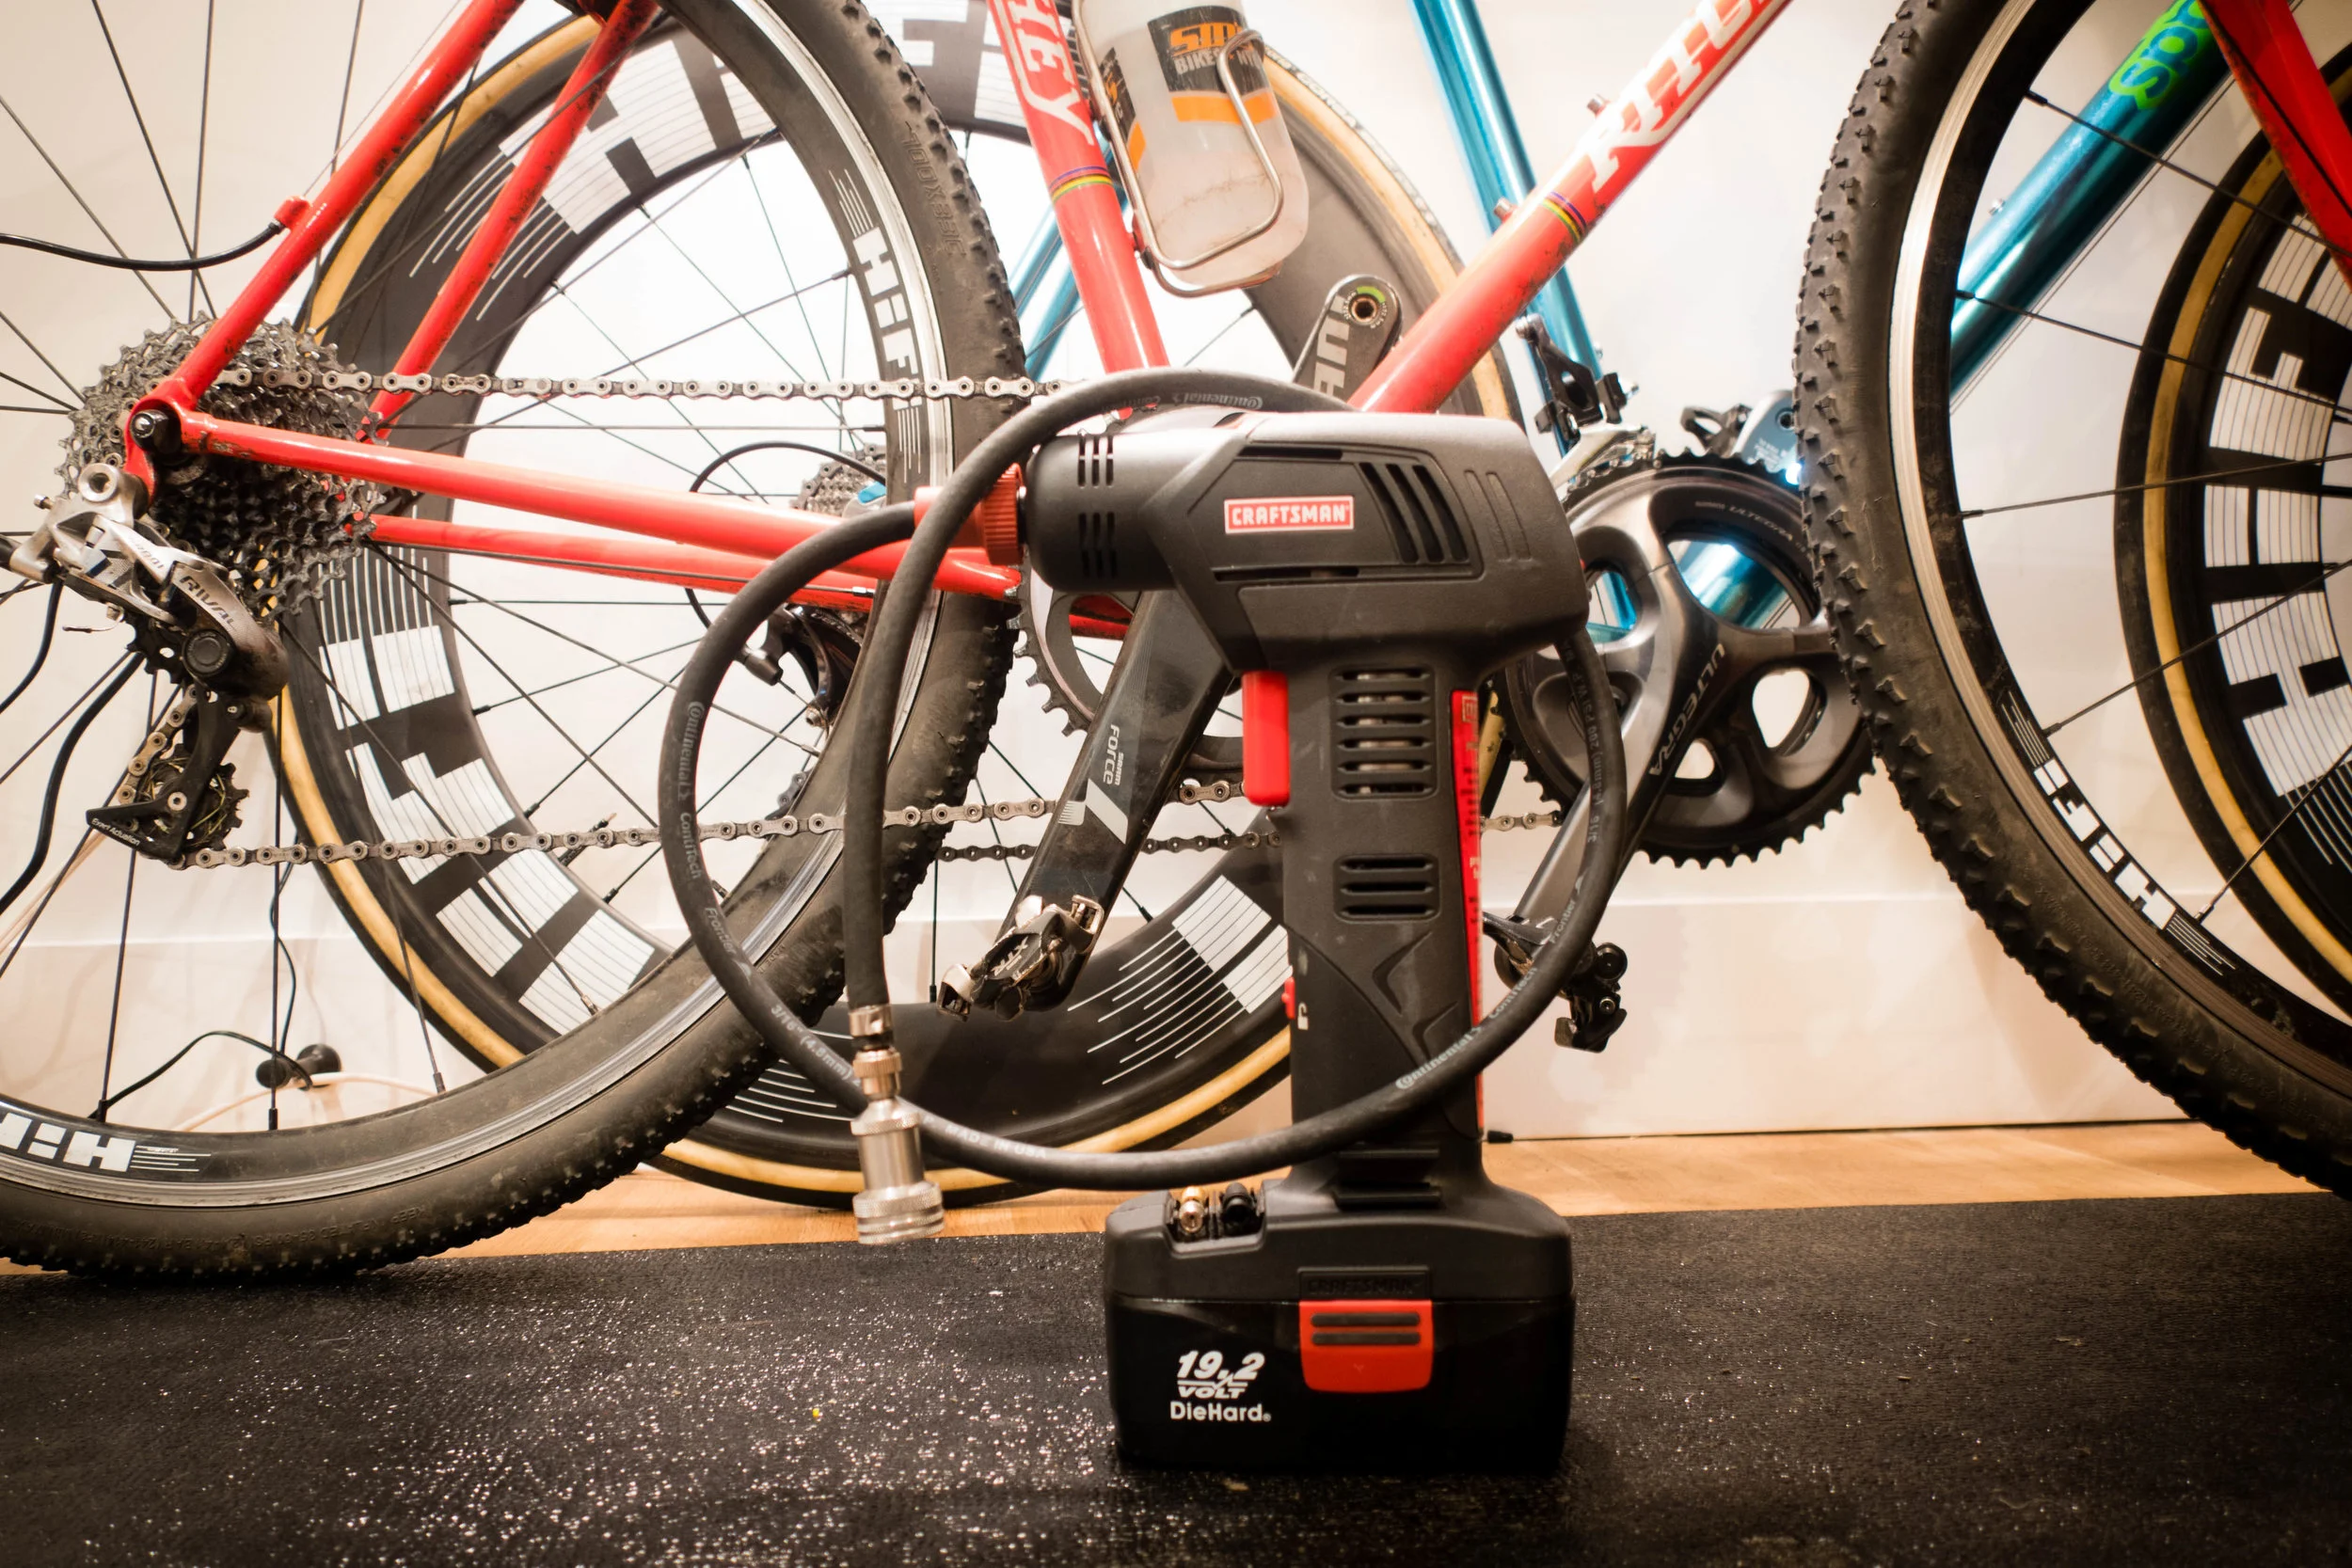
The finished product: a handheld air compressor that is perfect for CX.
Credit Where Credit is Due
When I built this compressor I had one goal: Have an air compressor that I could use both at home and at ‘cross races that would work to both set tubeless tires and help Coalition CC riders dial-in their pressure on tubeless and tubular setups alike. Initially I was going to buy a proper air compressor, with a tank like you would see on a construction site. Instead TBD member Clay Parker Jones pointed me in the direction of doing it the right way—with a handheld air compressor from Craftsman or AirHawk.
Step One: What to Buy
Your shopping list includes:
AirHawk PRO Cordless Portable Air Compressor - $49.85 OR — for better quality / battery life: Craftsman 19.2 volt cordless Inflator - $100 & Craftsman C3 19.2 volt lithium-ion batter & charger kit - $89
Silca Presta Head/Chuck - $34
Silca Thread-on Schrader Chuck - $12.99
Silca 3-ft replacement hose w/ clamps - $19.96
You may notice that the AirHawk and Craftsman inflators both come with presta converters. So you may think: I’ll skip the Silca stuff and stop reading. Big mistake. For one—look at all of the text and photos that are still below. For another, their presta adapters are trash; and difficult — at best — to use.
Step Two: Digging out the Hose Barb
Once you’ve acquired all the right gear, it’s time to get to work. First, unscrew the red cap that attaches the hose to the inflator; and then remove the stock hose. The reason we’re dumping this hose is because it’s braided and would fray once cut — not a good look. Pull the hose out through the red nozzle. Note: This may result in the black rubber gasket that holds the barb at the end of the hose falling off. If this happens, just take the gasket and seat it back inside the compressor nozzle.

An air-hose barb
Next you are going to remove the barb from the factory hose. The barb is the piece that threads the hose to the compressor through the red cap that we just unscrewed. To do this you'll need to cut the hose, and then use tin-snips to remove the clamp at the end of the hose; or simply use needle-nose pliers to work the rubber off from underneath the barb. Don't be afraid to get a bit rough, you can't damage the barb and we're going to discard the factory hose anyway. Once you've removed the barb discard the factory hose, push the barb into the silca hose and using pliers tighten the clamp around the outside of the new silca hose to secure the barb in place. It'll end up looking like this:

A gold hose barb inside the hose and secured by a clamp. The barb then goes through the red screw cap again, which screws onto the inflator.
Step Three: The Schrader Chuck and Presta Head
On the other end of the hose, insert the Silca Schrader chuck barb into the hose and use pliers to tighten the clamp around the outside of the new Silca hose to secure the chuck barb in place. Then simply thread the Presta Head onto the Schrader chuck, and you’re good to go.
A pro-tip on Silca presta valve chucks: They are known from time-to-time remove the valve core entirely when first used. To avoid this, you can first “loosen” the chuck by gently putting needle-nose pliers inside in the presta head and working them clockwise around the red gasket. Don’t go too hard lest you damage the gasket.

The schrader chuck barb is installed on the hose; and the Silca presta head threads into the chuck.
Step Four: Usage
The digital pressure display is the killer feature of this unit: With precision to a tenth of a PSI and an easy to read display, you'll get exactly the pressure you're looking for every time; there's no guess work involved. And that's it. Your wallet is now lighter but you may as well sign up to be a pit-man for a Belgian UCI race.


We gathered together some of our favorite gifts for cyclists in this 2025 TBD Holiday Gift Guide.